.
.
.
- eazyPNR Travel Solutions
- eazyPNR Travel Platform
- White Label Travel Portal Setup
- WordPress Plugin Setup
- Cross-Platform SDK Setup
- Travel APIs
- Manage Funds
- Load Funds
- Transaction History
- Change Password
- Back Office
- Global Settings
- Upload your logo
- My Bookings / Cancel Bookings
- Manage Profile
- Setting a Markup
- Customize Searchbox
- Custom Styling (CSS)
- Payment Gateway
- SMTP Settings
- Go Live
- Settings
- Manage Pages
- Addons
- Whatsapp Notifications
- AI Chatbot Settings
- Travel Insurance
- Manage Cashback
- Manage Discount Coupons
- Meals & Baggages (SSR)
- Refund Protect
- Hold Bookings
Setting up a markup - White Label Travel Plugin/SDK
Home » Documentations » White Label Travel Plugin/SDK » Setting up a markup
Easy markup management - Setup a markup on each module bifurcatedly in percentage or flat
- Add a seperate convenience fee apart from markup
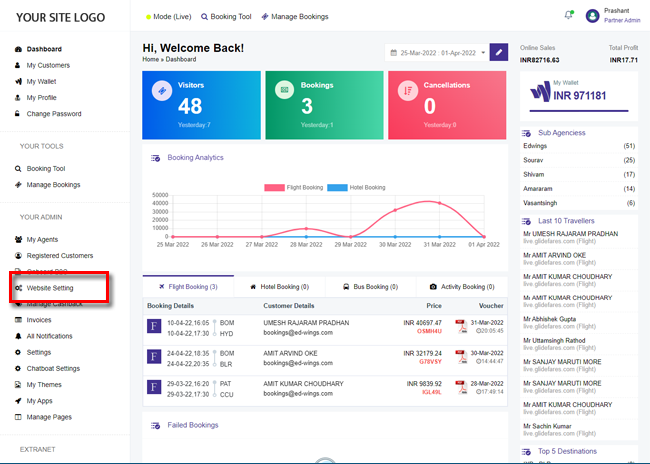
1. Login to your back office and navigate to Website Settings > Modules

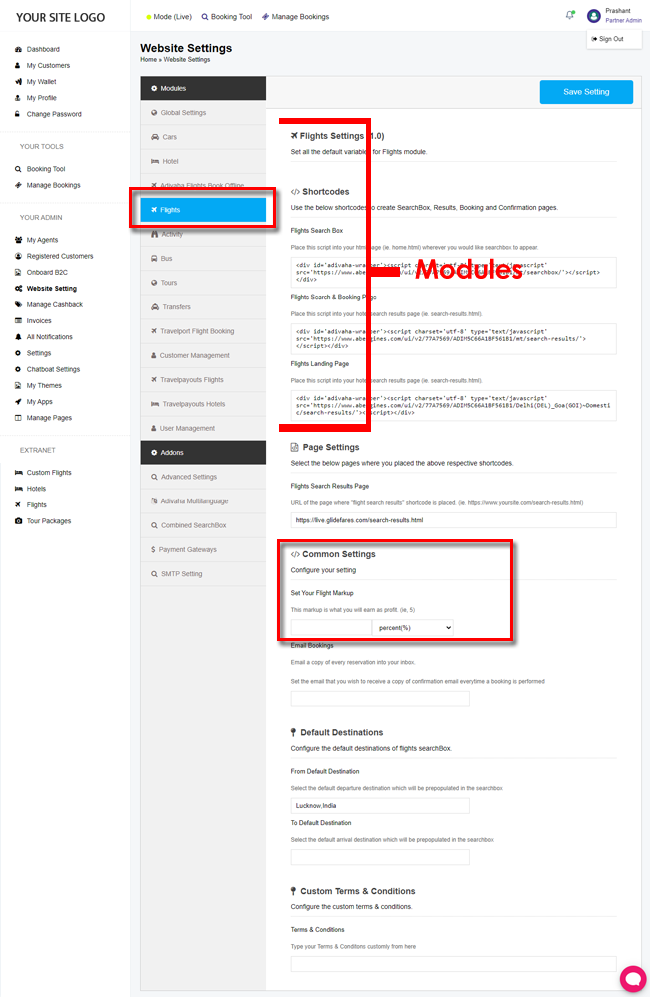
2. Click any module in the left panel to setup a markup. In this example, we will setup a markup in Flights module.

3. Click Save Setting