- eazyPNR Travel Solutions
- eazyPNR Travel Platform
- White Label Travel Portal Setup
- WordPress Plugin Setup
- Cross-Platform SDK Setup
- Travel APIs
- Manage Funds
- Load Funds
- Transaction History
- Change Password
- Back Office
- Global Settings
- Upload your logo
- My Bookings / Cancel Bookings
- Manage Profile
- Setting a Markup
- Customize Searchbox
- Custom Styling (CSS)
- Payment Gateway
- SMTP Settings
- Go Live
- Settings
- Manage Pages
- Addons
- Whatsapp Notifications
- AI Chatbot Settings
- Travel Insurance
- Manage Cashback
- Manage Discount Coupons
- Meals & Baggages (SSR)
- Refund Protect
- Hold Bookings
Setup & Installation - eazypnr White Label Travel Plugin/SDK
Home » Documentations » White Label Travel Plugin/SDK » Setup & Installation
Step-by-Step Guide For You to Create Your Online Travel Booking Website
- Settle your commercials and obtain your setup link
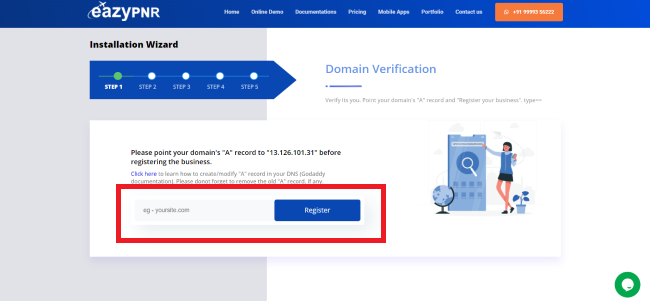
1. Point your domain's "A" record to "13.126.101.31" and visit the setup link. Click here to learn how to create/modify "A" record in your DNS (Godaddy documentation). Please donot forget to remove the old "A" record, if any.

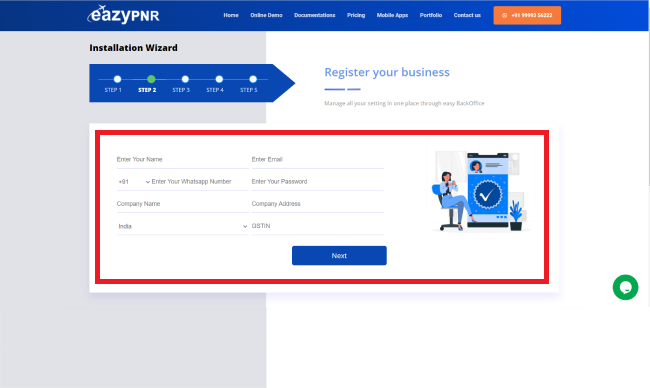
2. If pointed correctly, you will now be taken to the Business Registration page. You can fillin your company information and hit "Next"

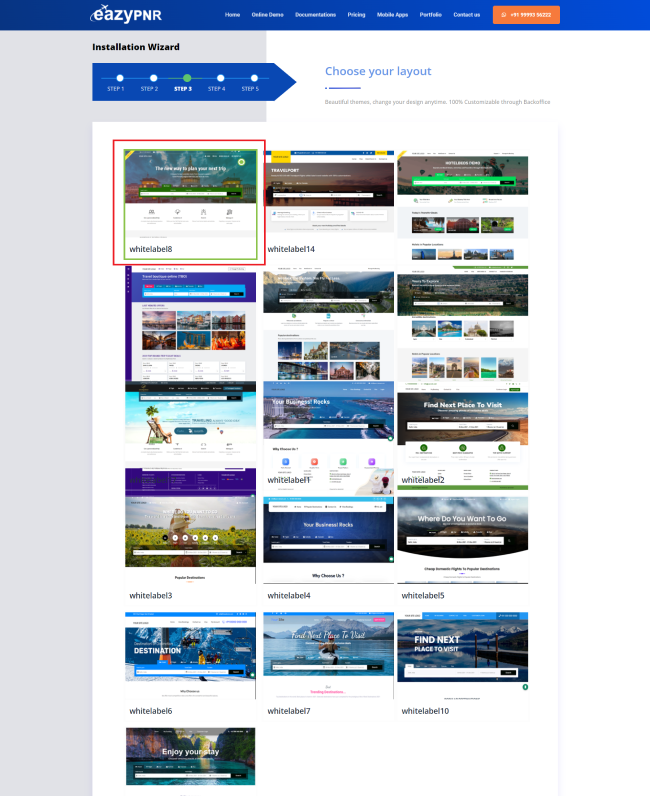
3. Select the design you feel is close to your requirement and click "Next"

4. You will now land to the confirmation page with the links to your white label travel website and the backoffice. Generally, it takes few minutes to get the site published, but at times it may take 24-48 hrs. You should receive an email with the login info. Wasn't that easy?